• Skip to primary navigation
  • Skip to main content
  • Skip to primary sidebar
  • Skip to footer

Stephany Wilkes

Author & Sheep Shearer

  • Stephany Wilkes
  • Home
  • ABOUT
  • BOOK
  • SHEARING
  • WRITING
    • PUBLISHED WORK
    • BLOG
  • MEDIA
  • CONTACT

sheep shearing

January 17, 2023 by Stephany Wilkes

How To Get Started In Sheep Shearing

If you’d like to try sheep shearing, where do you start?

Not on YouTube or TikTok. Shearing cannot be taught solely or even primarily via video. That would be like trying to learn figure skating by video, without ever having set foot on ice. Video cannot convey weight, power, force, momentum, resistance, balance, temperature, and duration, much less all of these simultaneously. A video cannot convey how gentle a physical motion is, that may appear rough (or vice versa).

A black-and-white spotted sheep with horns leans against a sheep shearer's bent left knee in brown pants
In this position, the shearer needs to feel the position of the sheep’s spine and ensure the skin on the sheep’s neck is not slack, among other things.

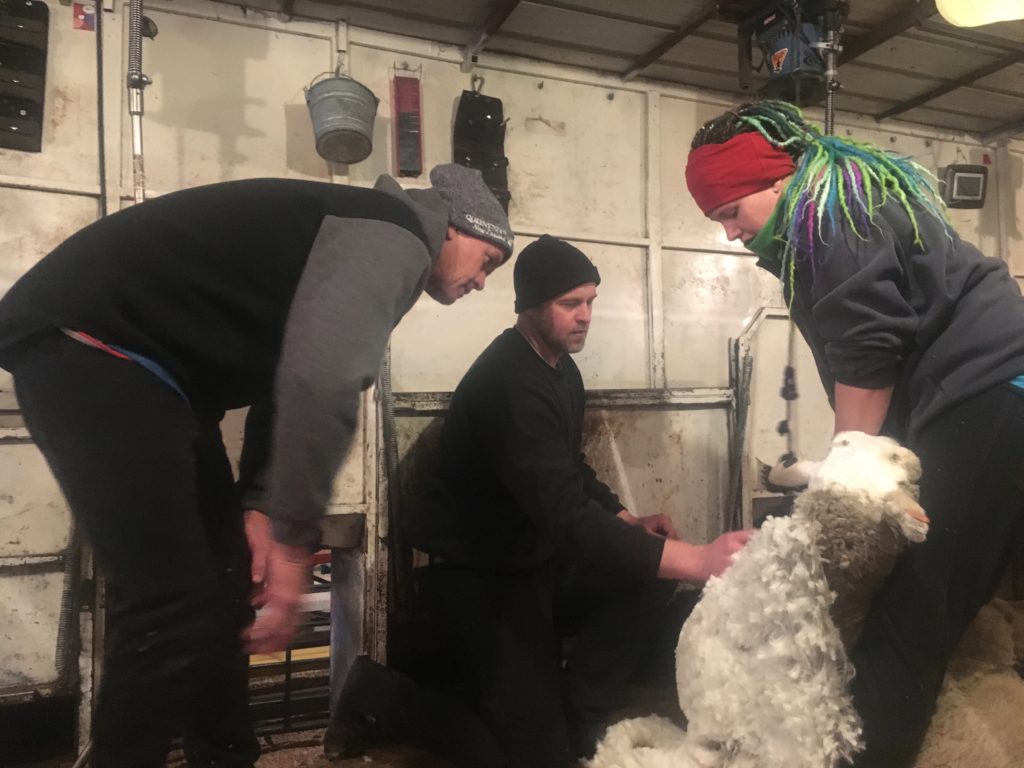
You must go to shearing school, or at least apprentice, and ideally go to shearing school and then apprentice, on at least a few jobs with other shearers. Shearing school will introduce and connect you with other shearers, and these folks will open doors to what is actually a very small world, even globally. You will make friends for life.

How To Find Sheep Shearing Schools

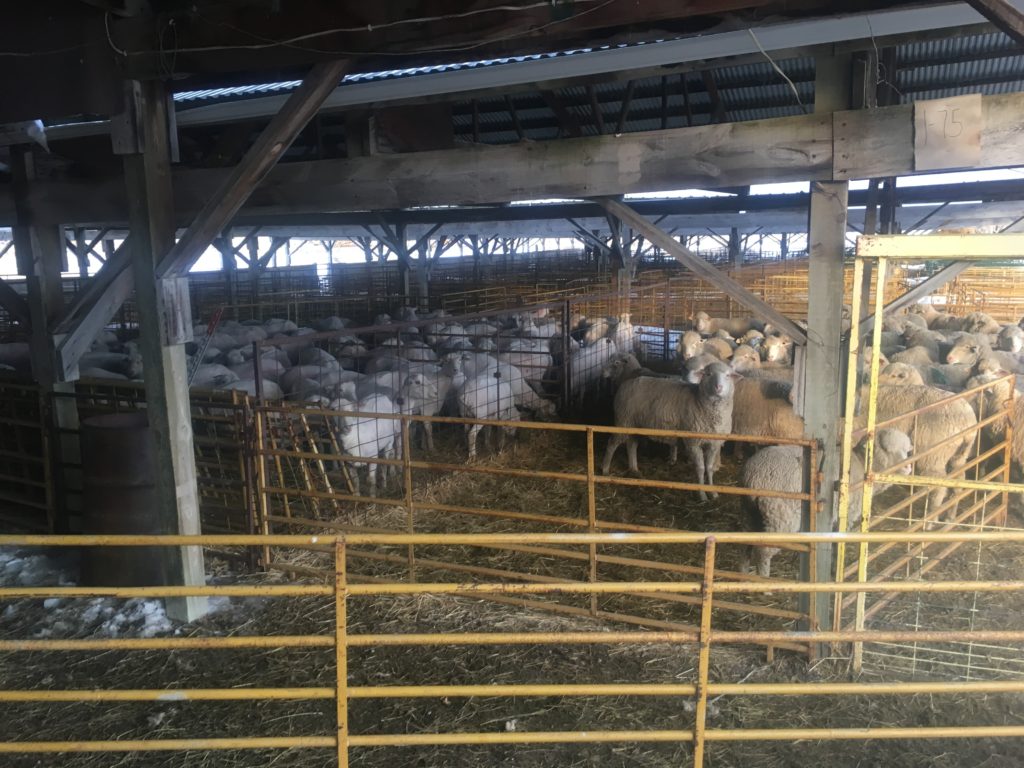
The American Sheep Industry Association (ASI) website is the best place to begin, and specifically with their newsletter. Each week’s ASI newsletter includes a list of Upcoming Events, which includes shearing schools. Most shearing schools in the U.S. take place in spring (because sheep get sheared before hot summer arrives), last for three to five days, and cost $250-$500. Scholarships and financial assistance are often available. If these are not explicitly mentioned, ask!

A small selection of the list of shearing schools mentioned each week in the ASI newsletter. Get it!

In addition to the ASI Newsletter, sheep and wool growers’ associations, and agricultural schools and extensions often sponsor sheep shearing schools. Some of these organizations also maintain directories of sheep shearers for their members to find, to which you can add yourself later. If you live in Montana, for example, you may want to join (or at least subscribe to the newsletter of) the Montana Wool Growers Association (MWGA), even if you are not a wool grower yourself. This will introduce you to sheep-related events, trainings, and other shearers with whom you might work.

A Black woman in dreadlocks, blue shirt, and black overalls holds a white sheep laying on its side, a preparation step before she shears the sheep's belly wool off
My friend, Beatrice, assisted by shearing instructor Gary. Beatrice has just finished guiding the sheep to the floor so that she can get the ewe into position to shear her belly wool off. This move may appear rough or uncomfortable in a photo, but is quite gentle when done properly, because it uses movements sheep make naturally.

You can also search online for “shearing school” + the name of your state, but the results are not always great. Algorithms favor mainstream popularity and many not handle niche content well or accurately. If you don’t find a reasonably nearby shearing school via a search engine, do not be discouraged.

A few days of shearing school will tell you if it’s something you want to do, and can physically do, going forward. Get through shearing school first and then think about what’s next.

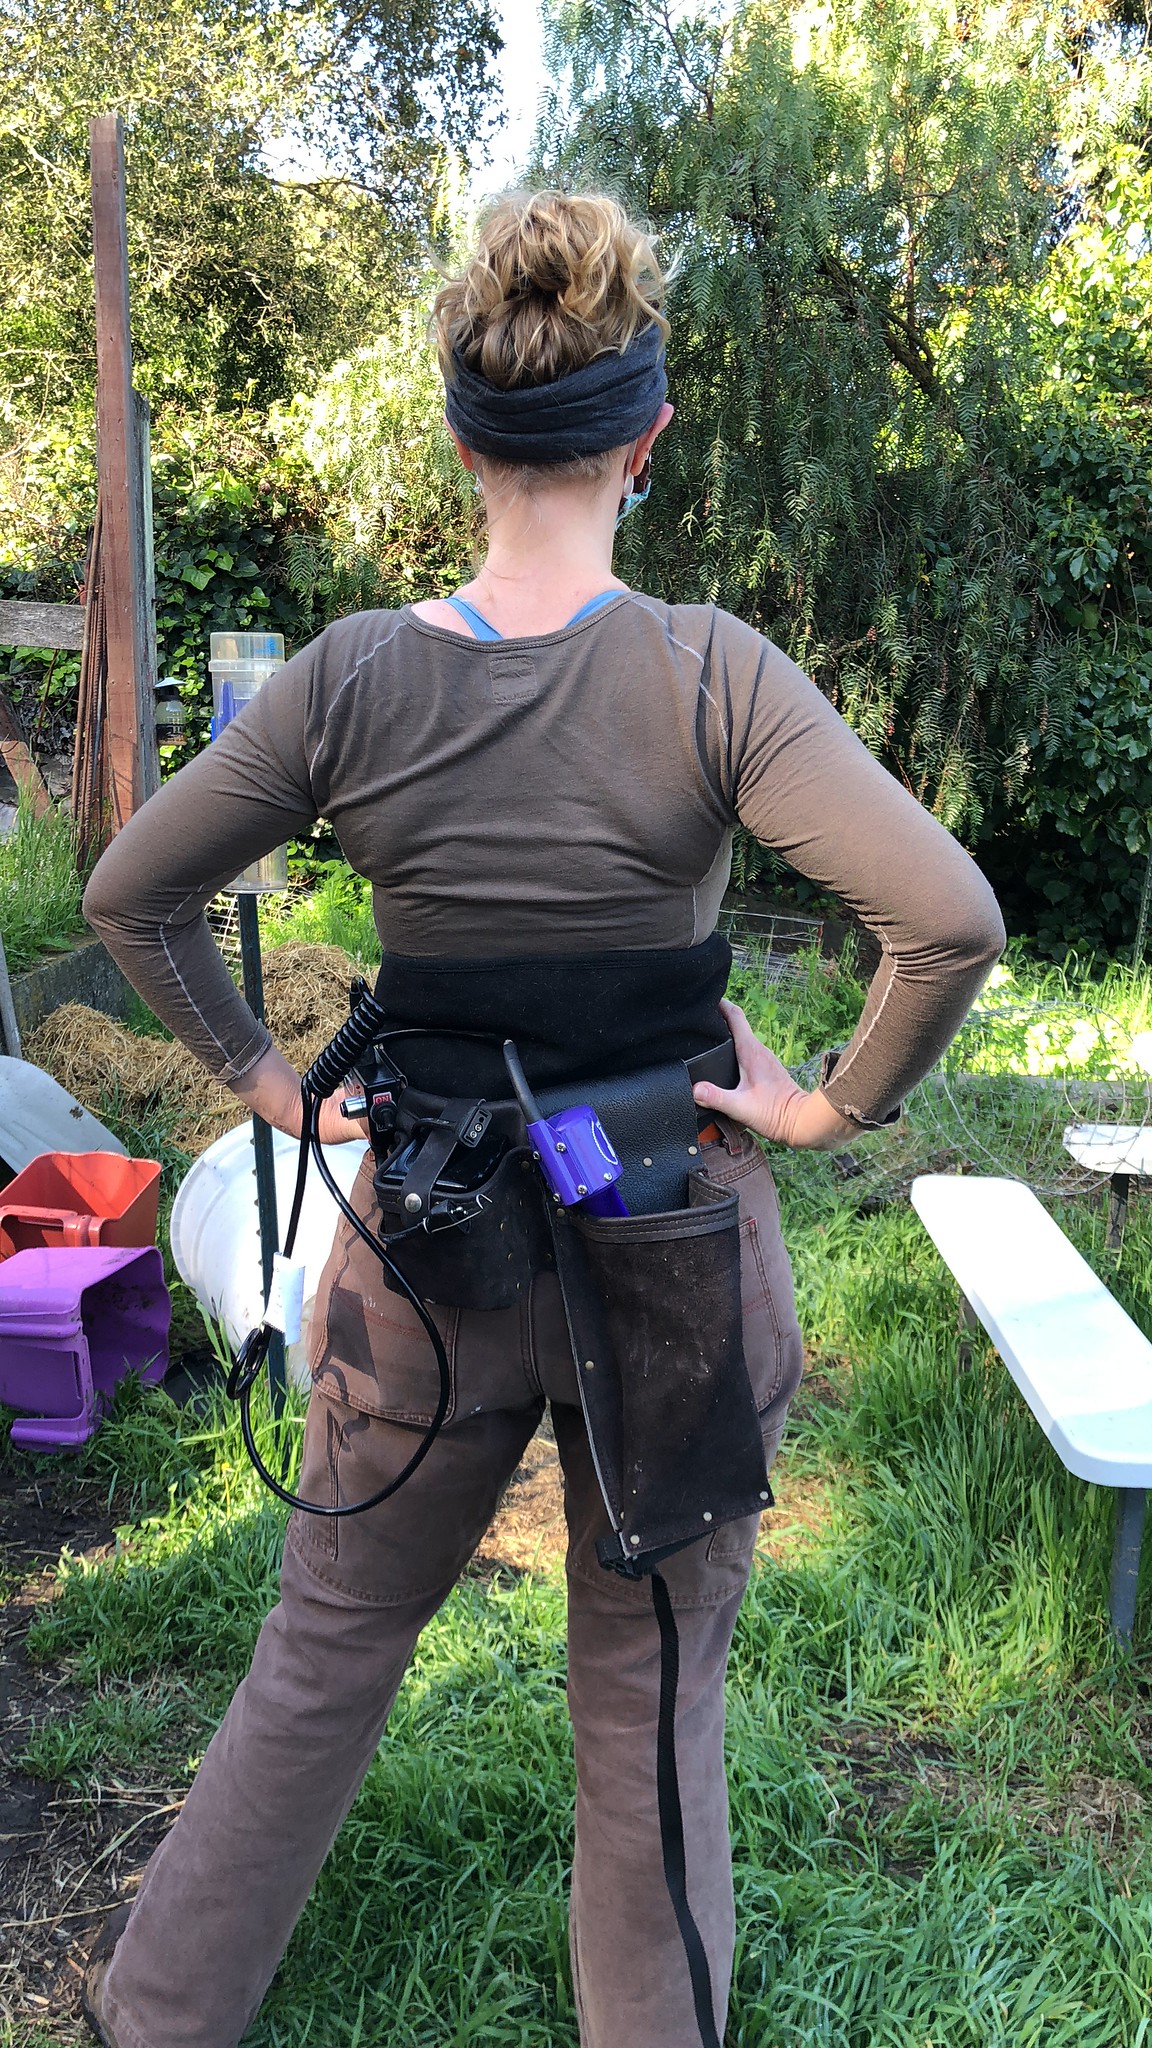
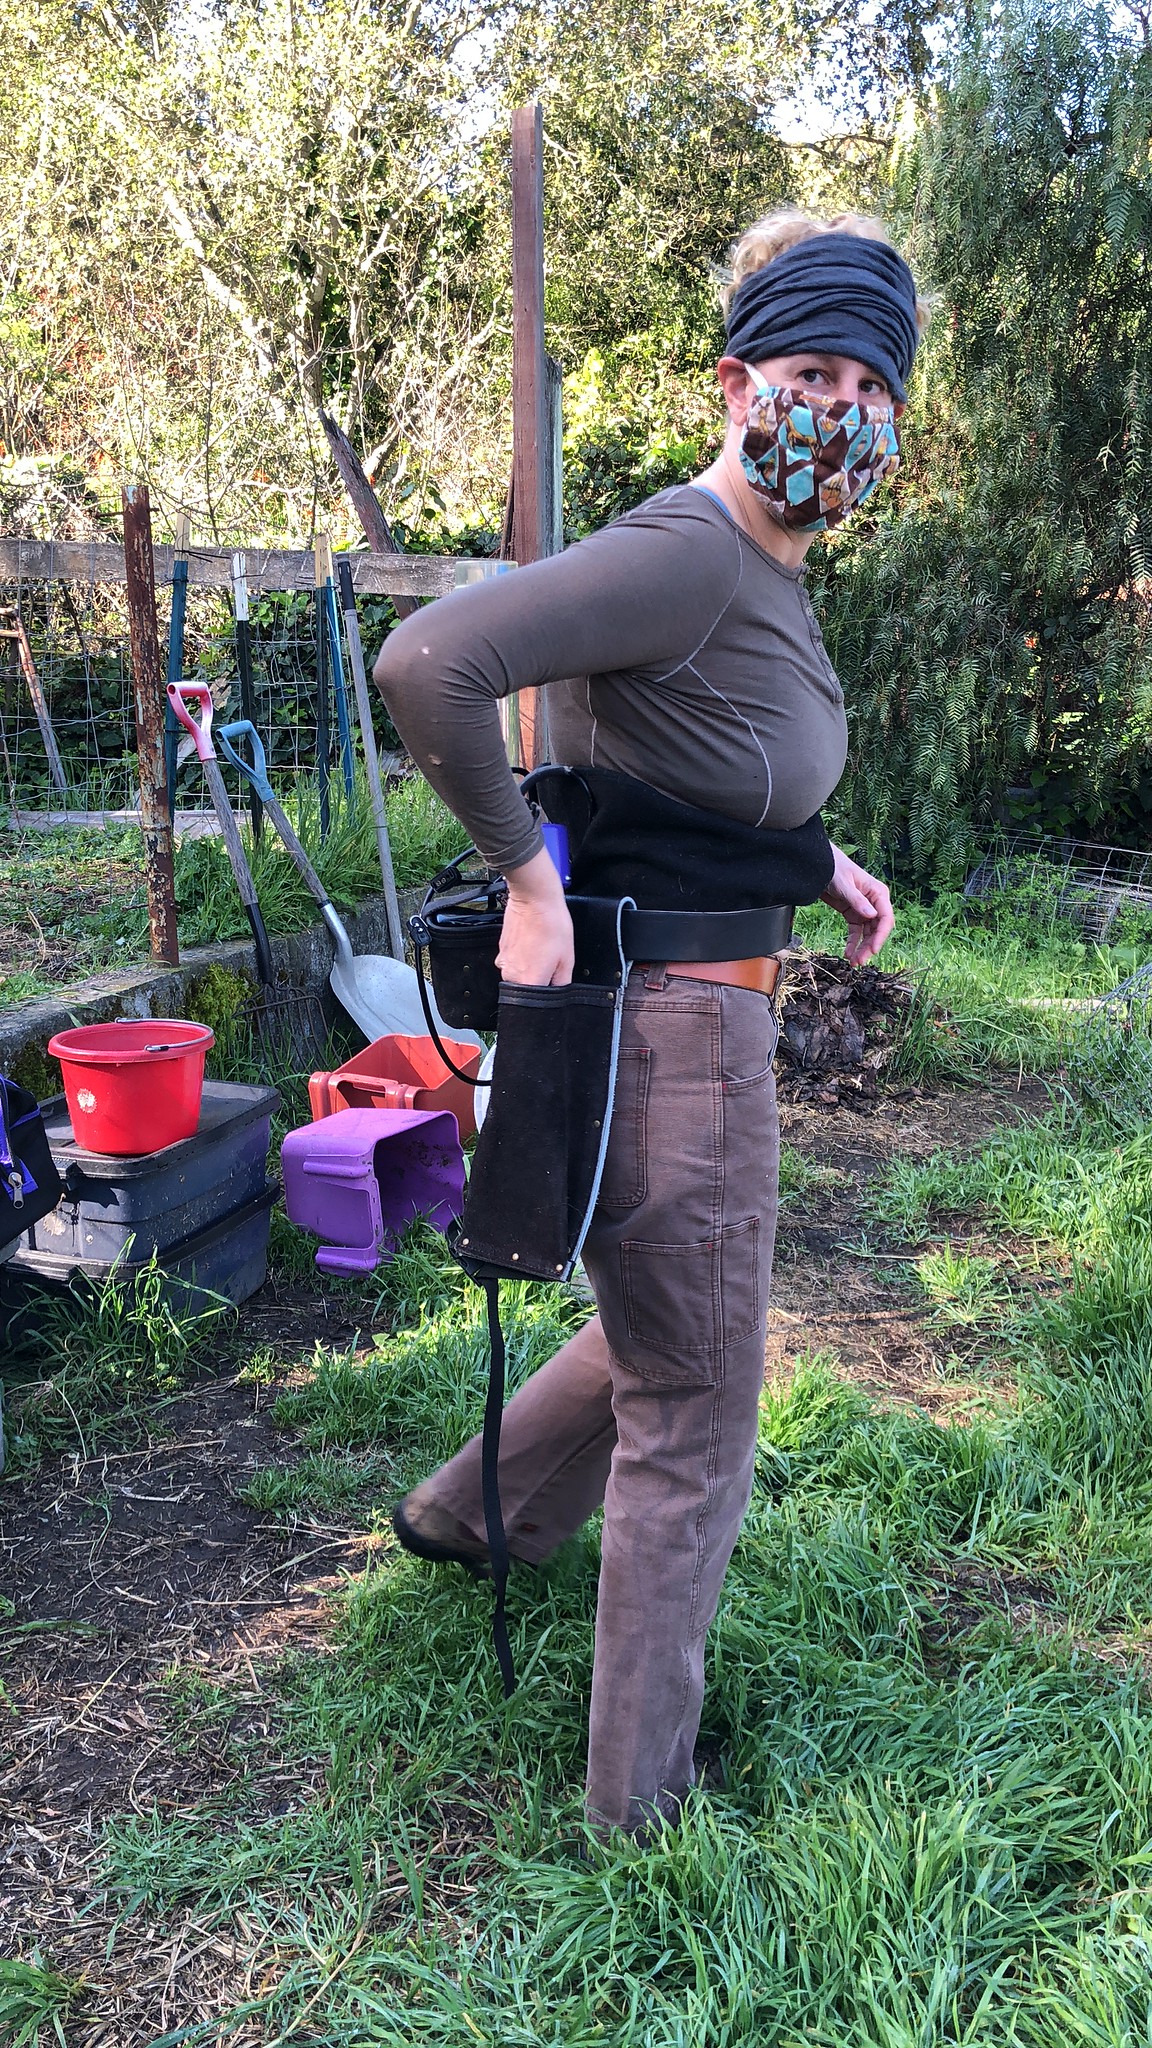
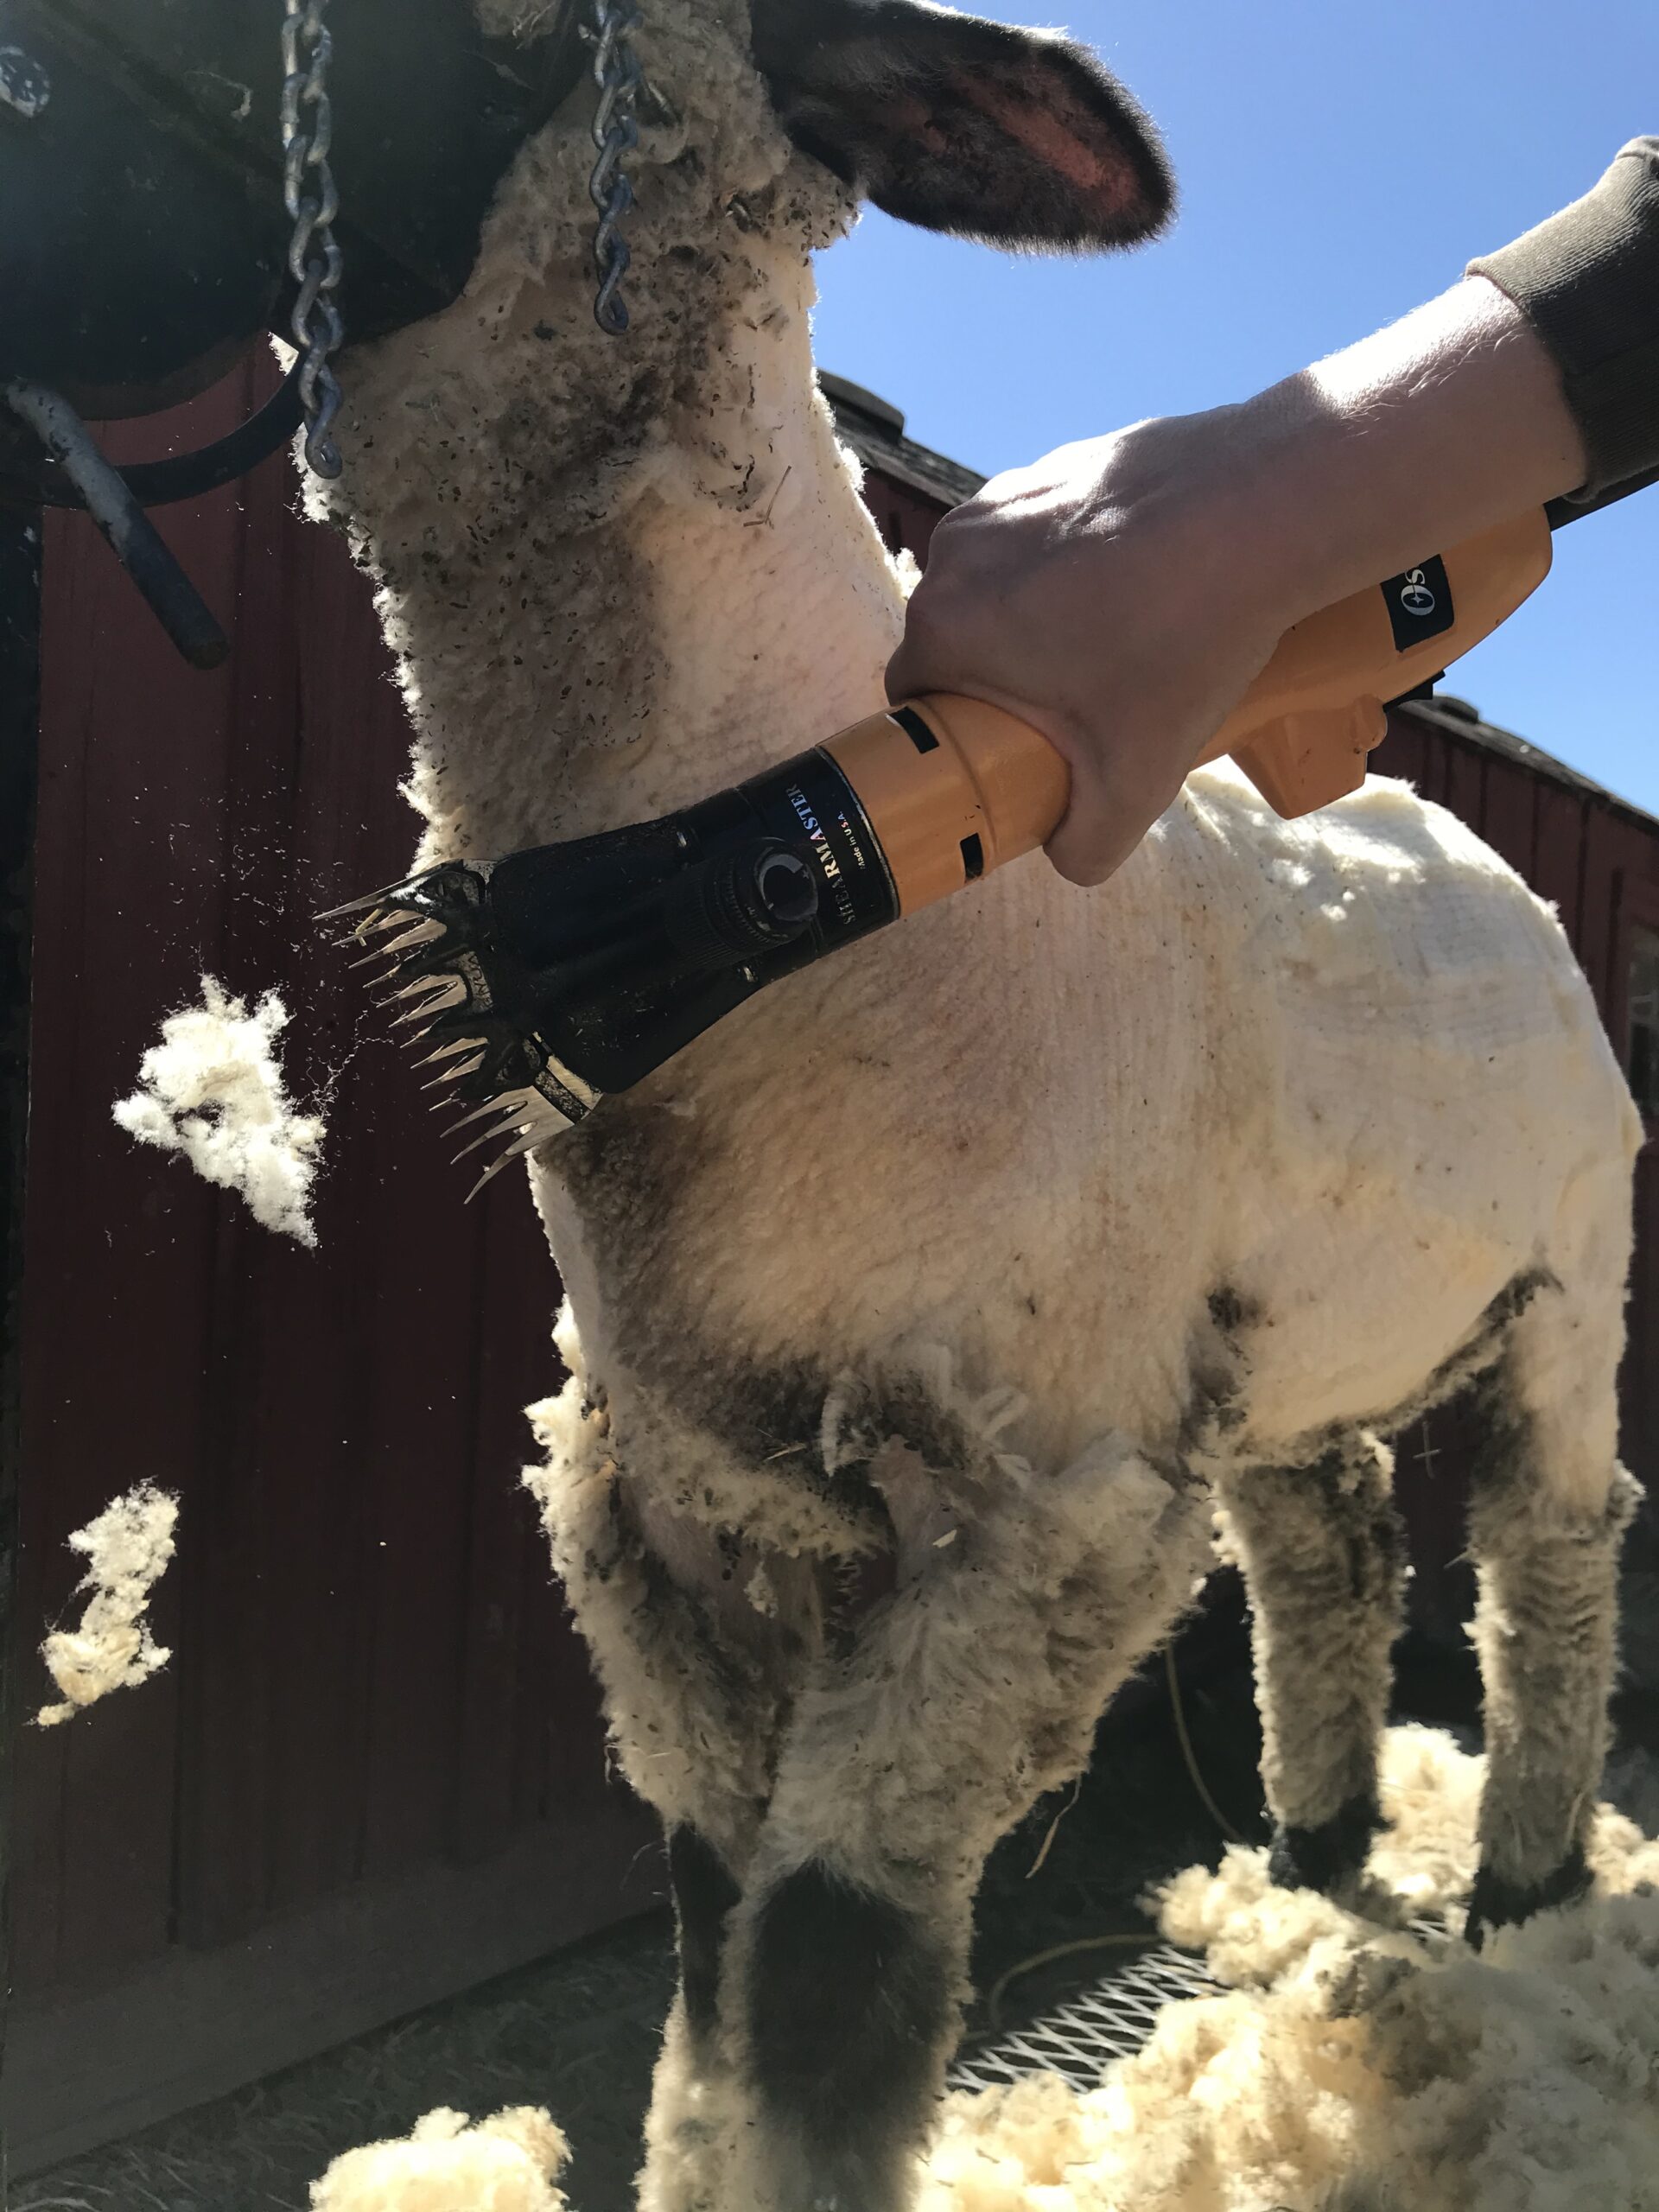
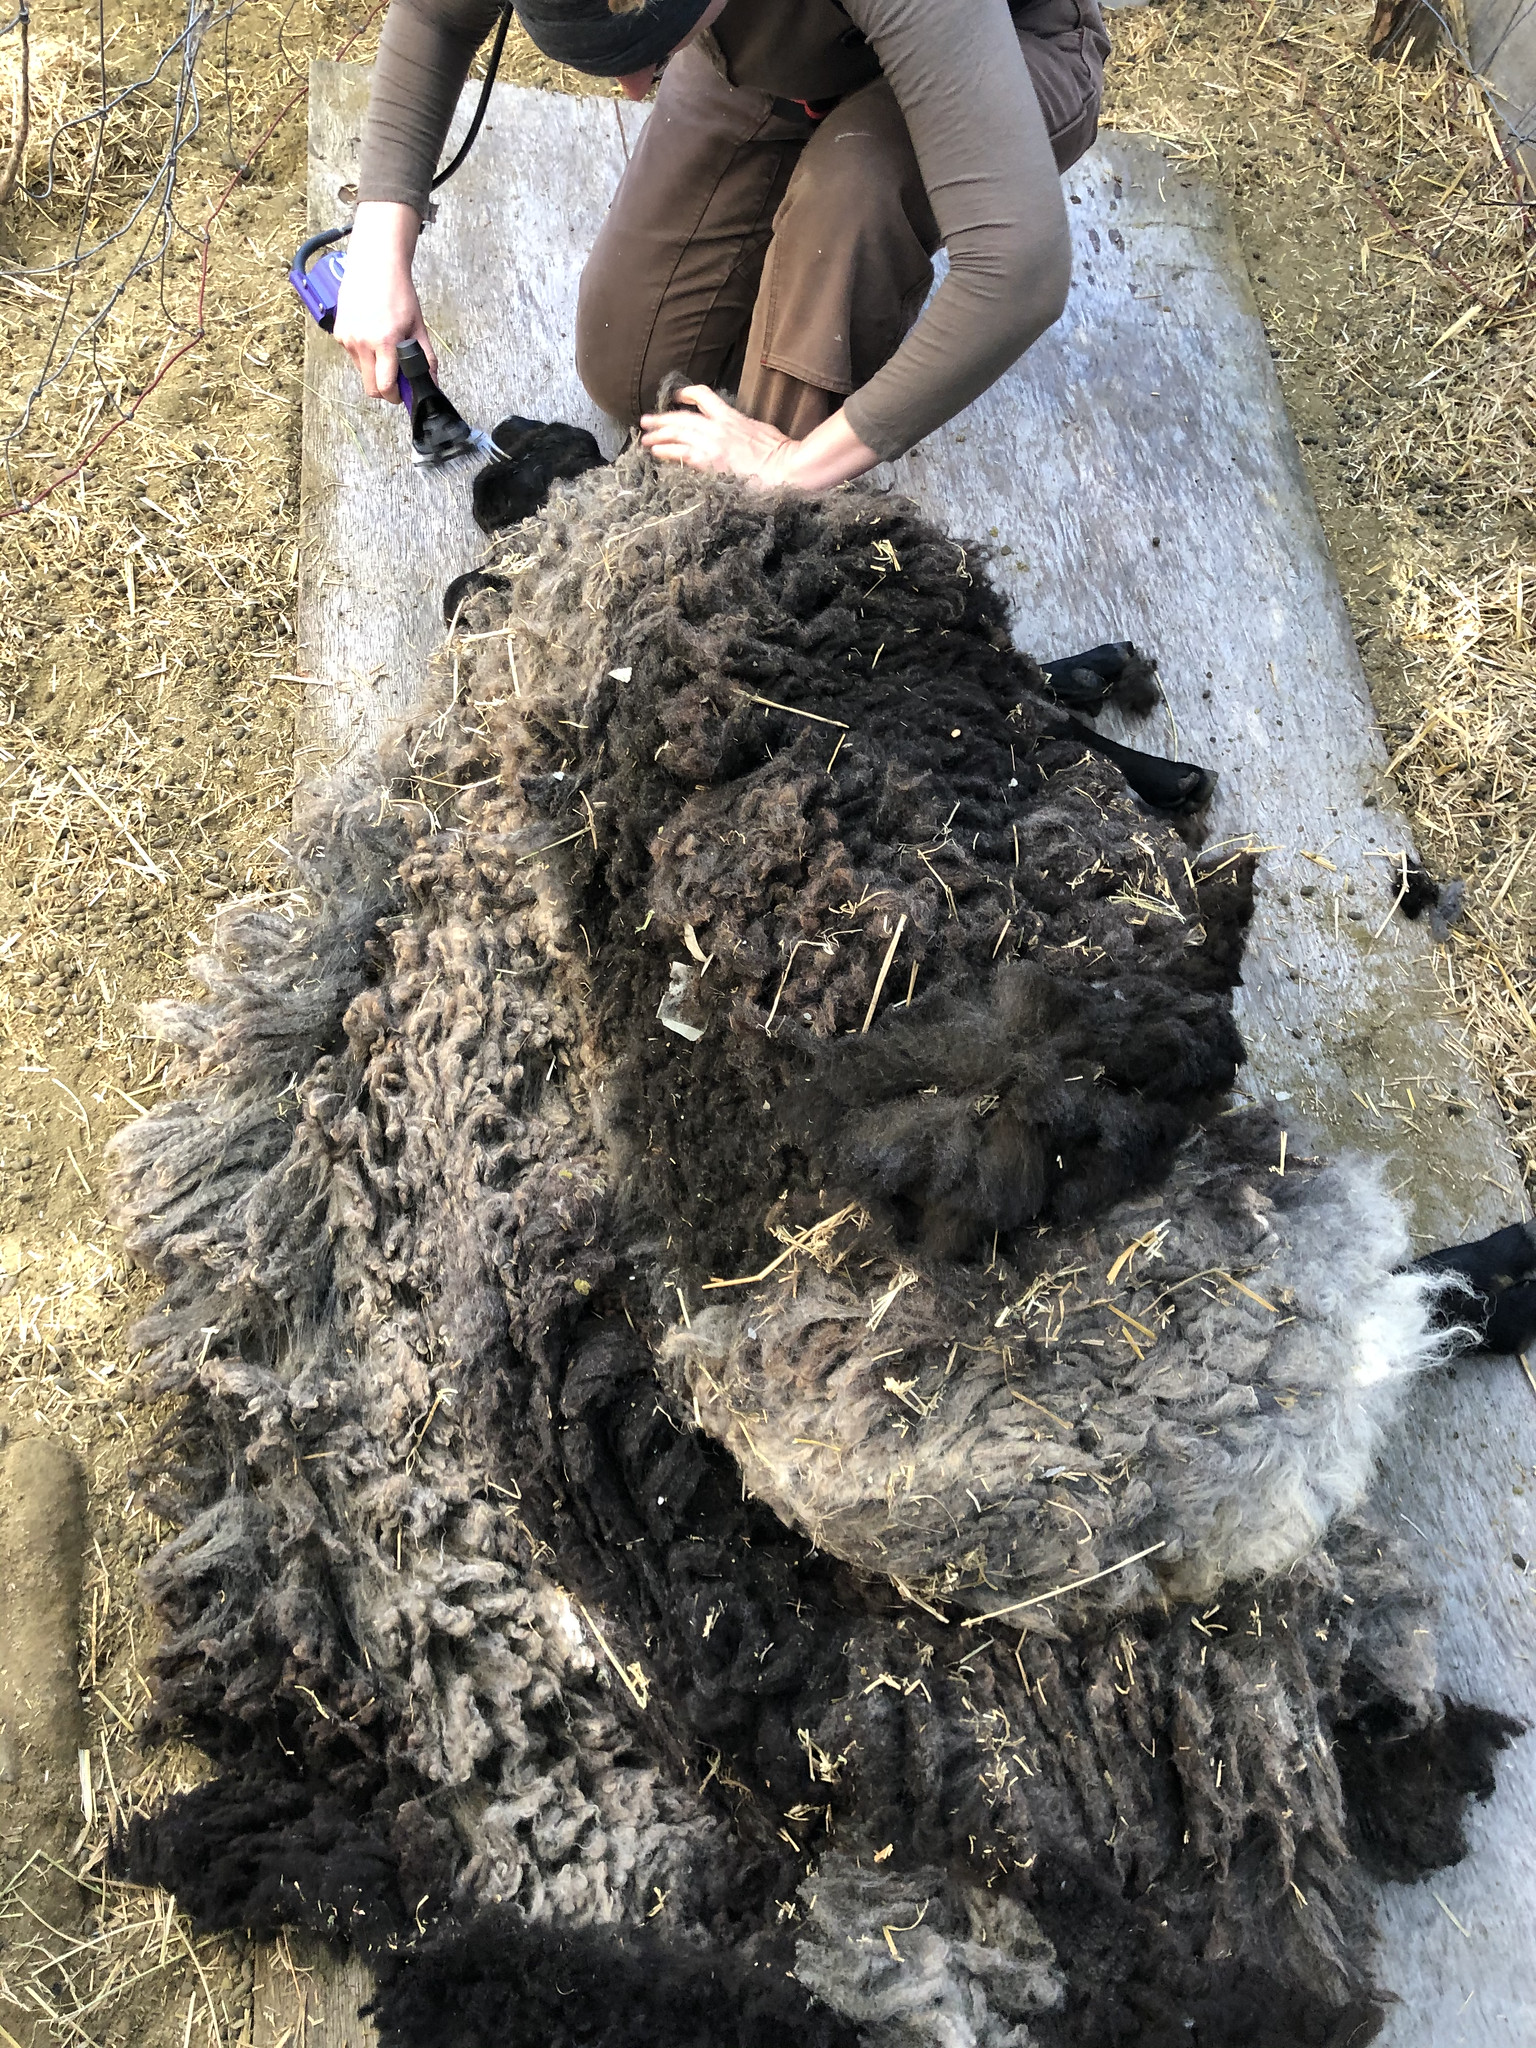
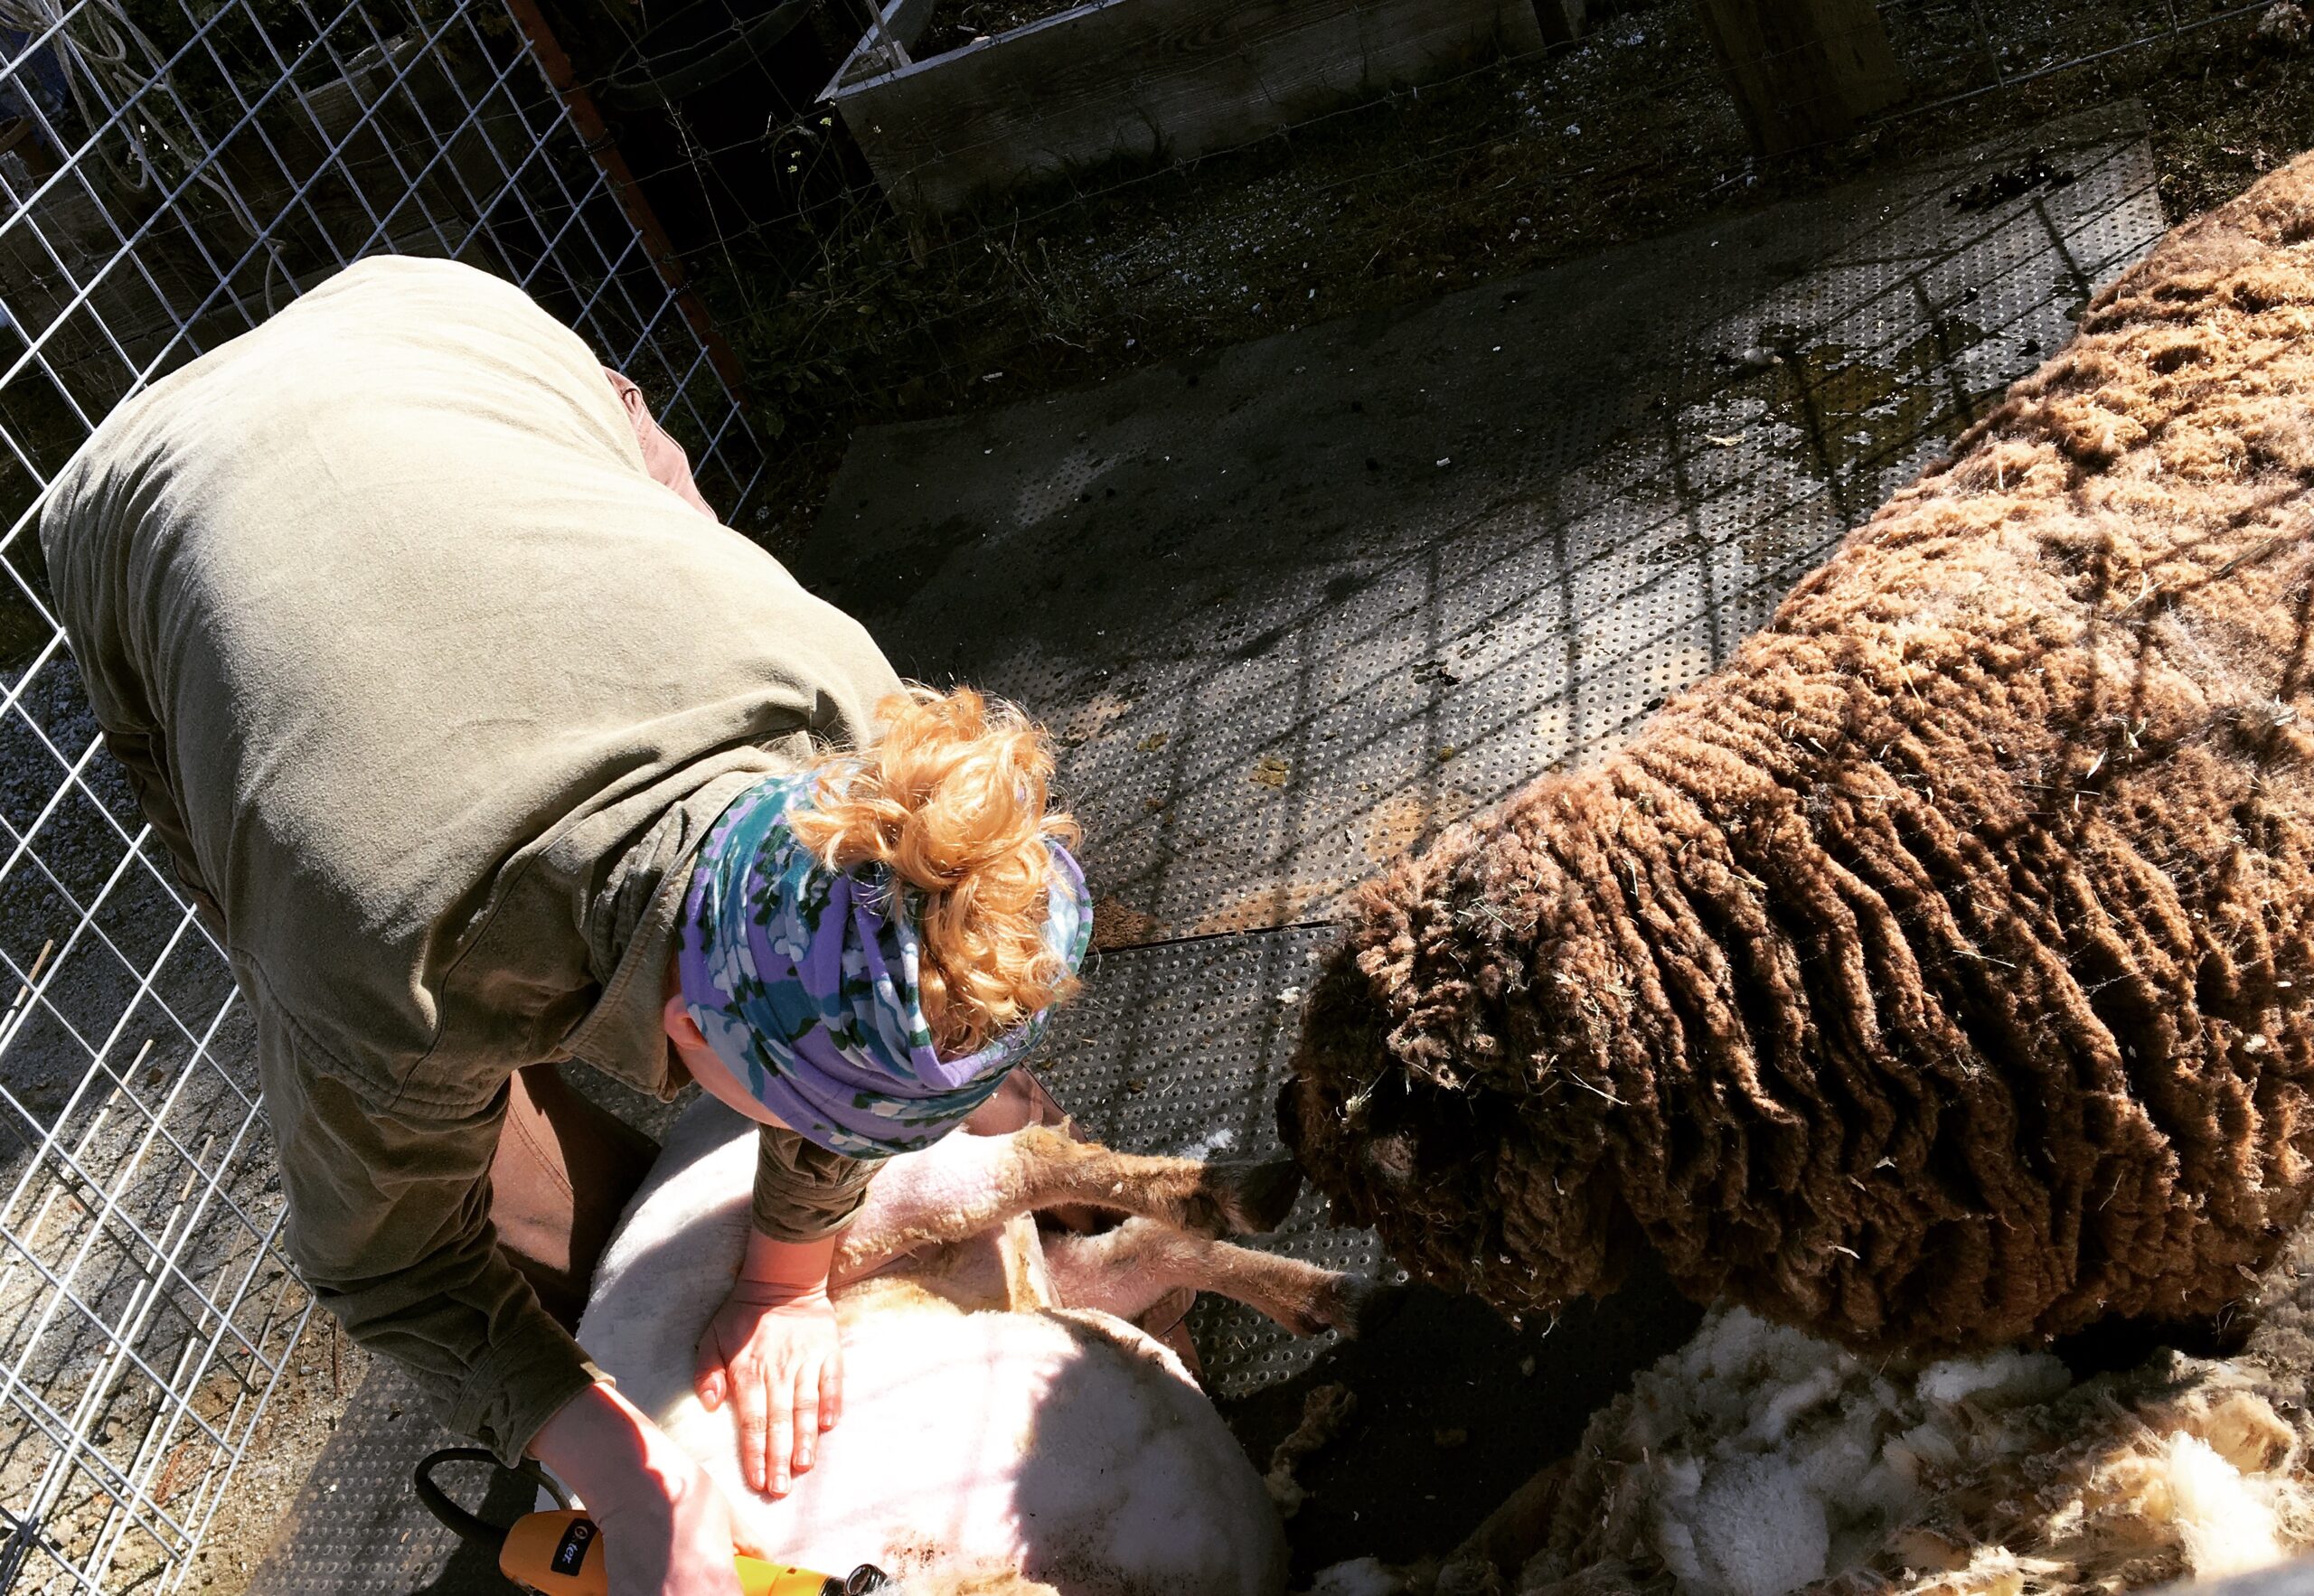
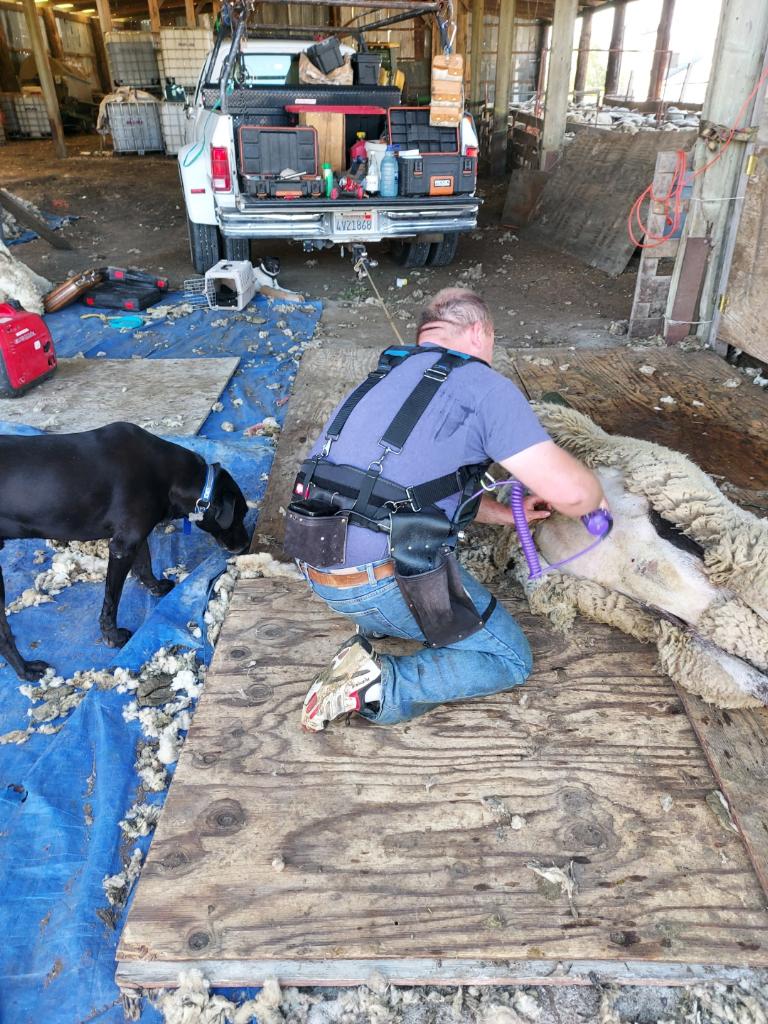
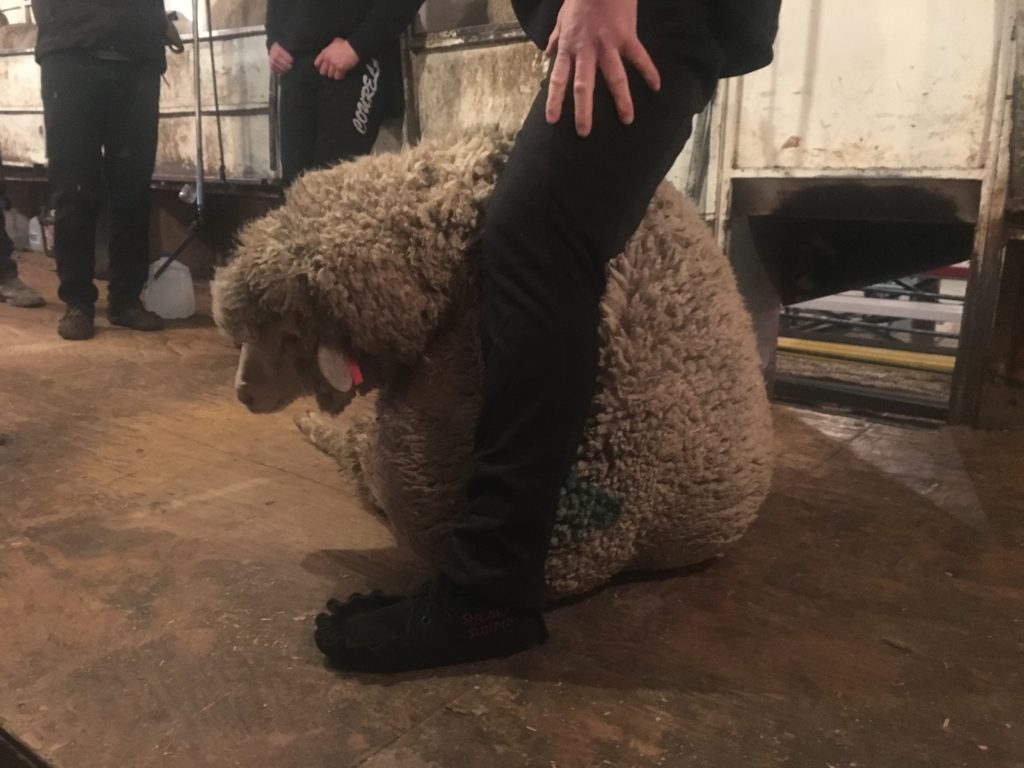
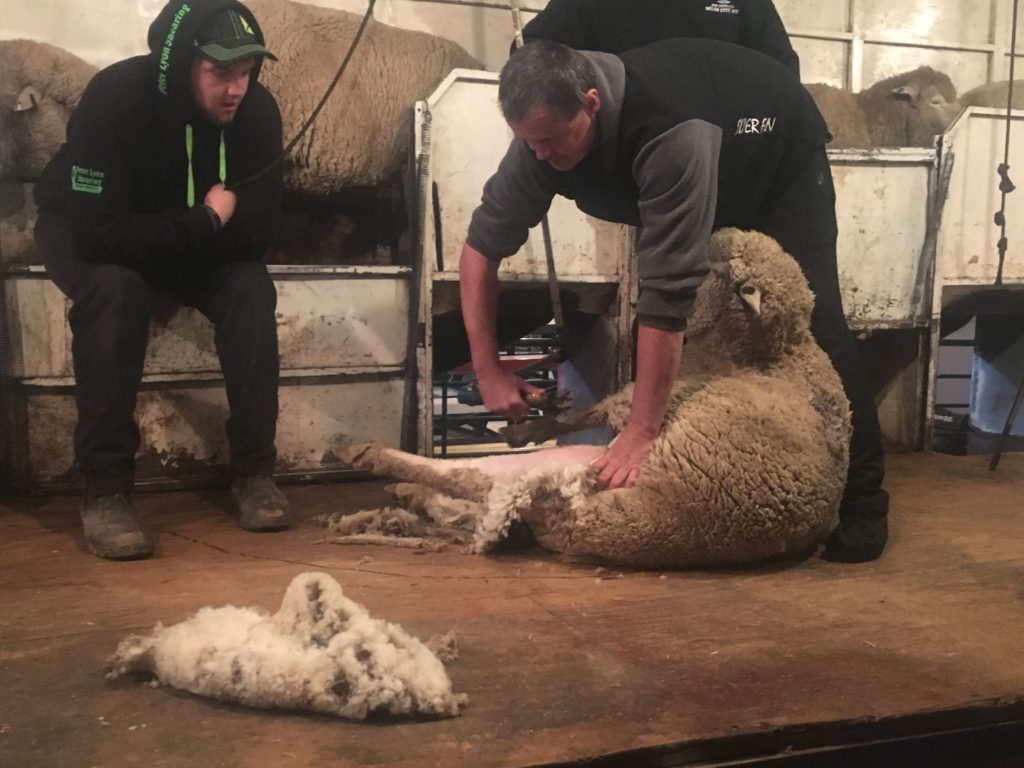
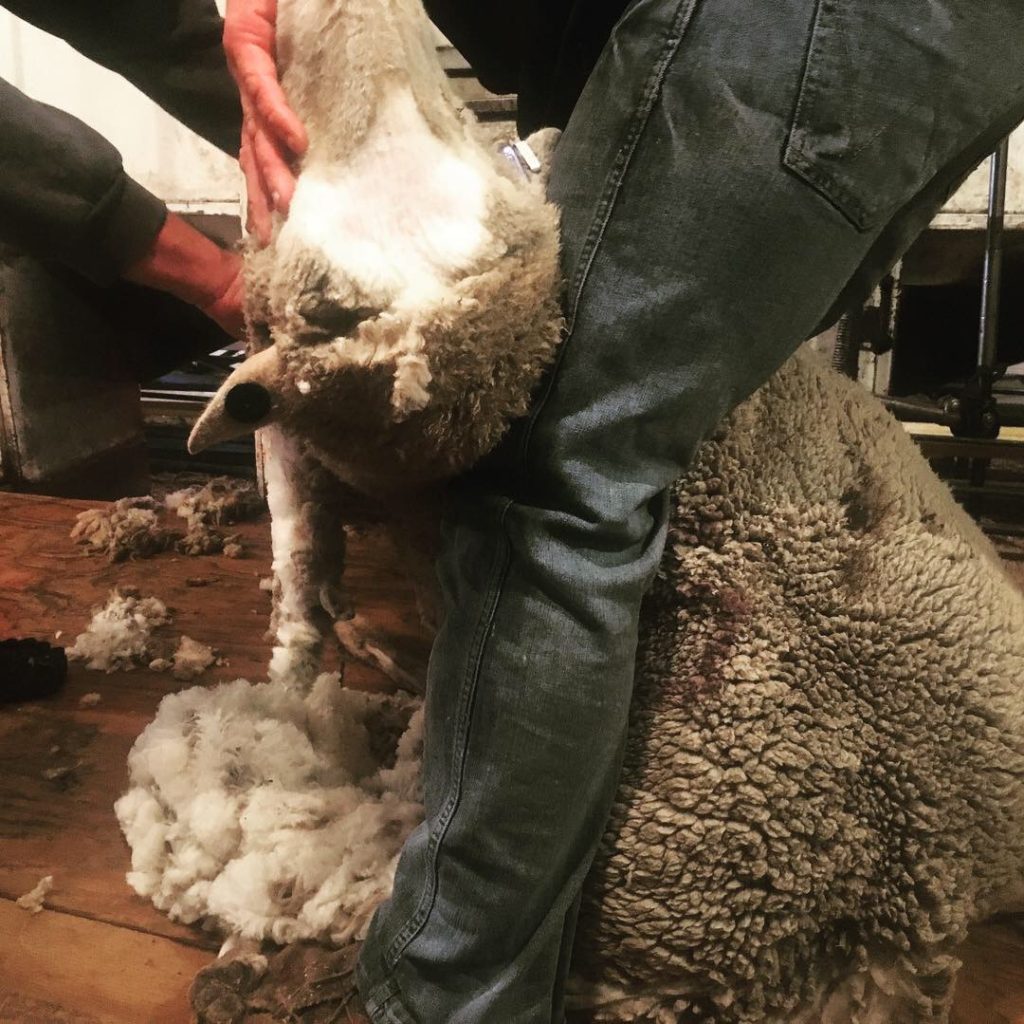
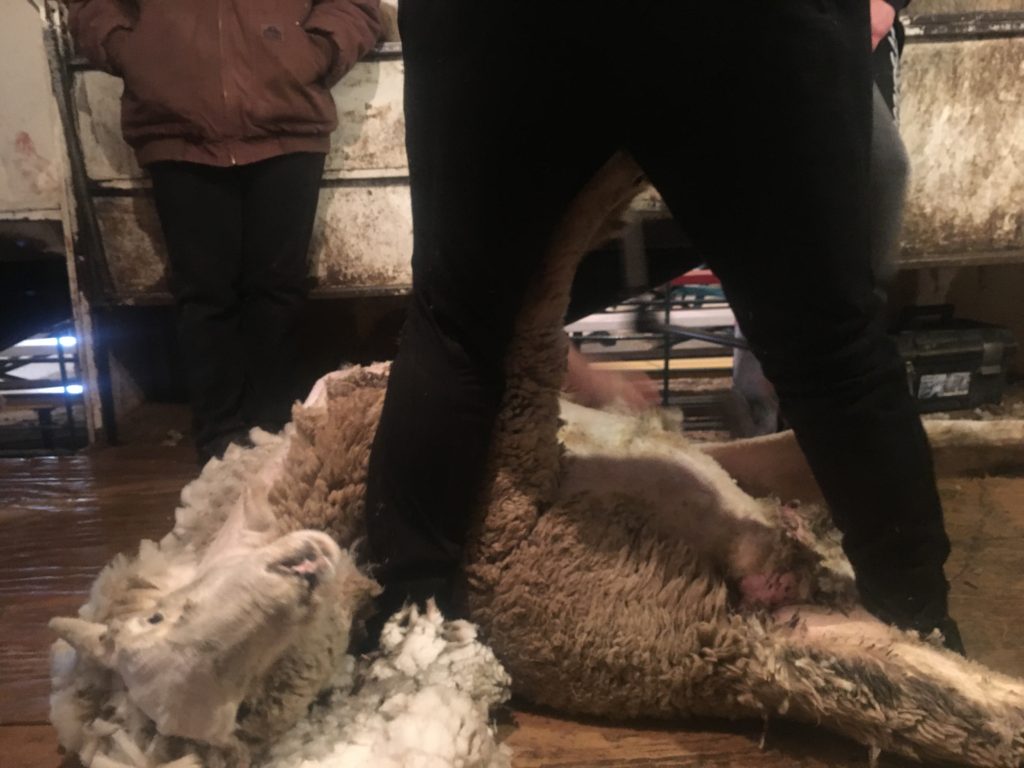
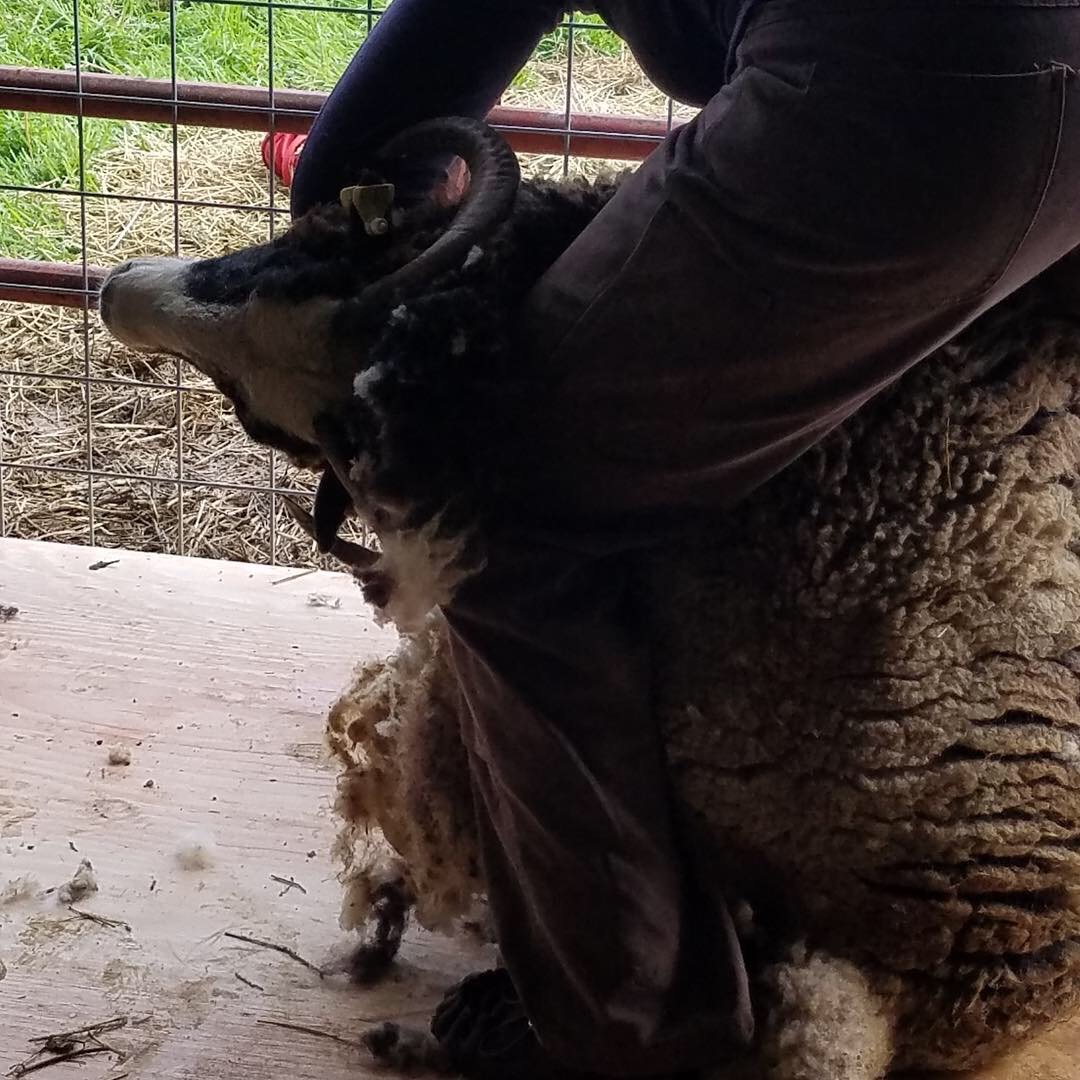
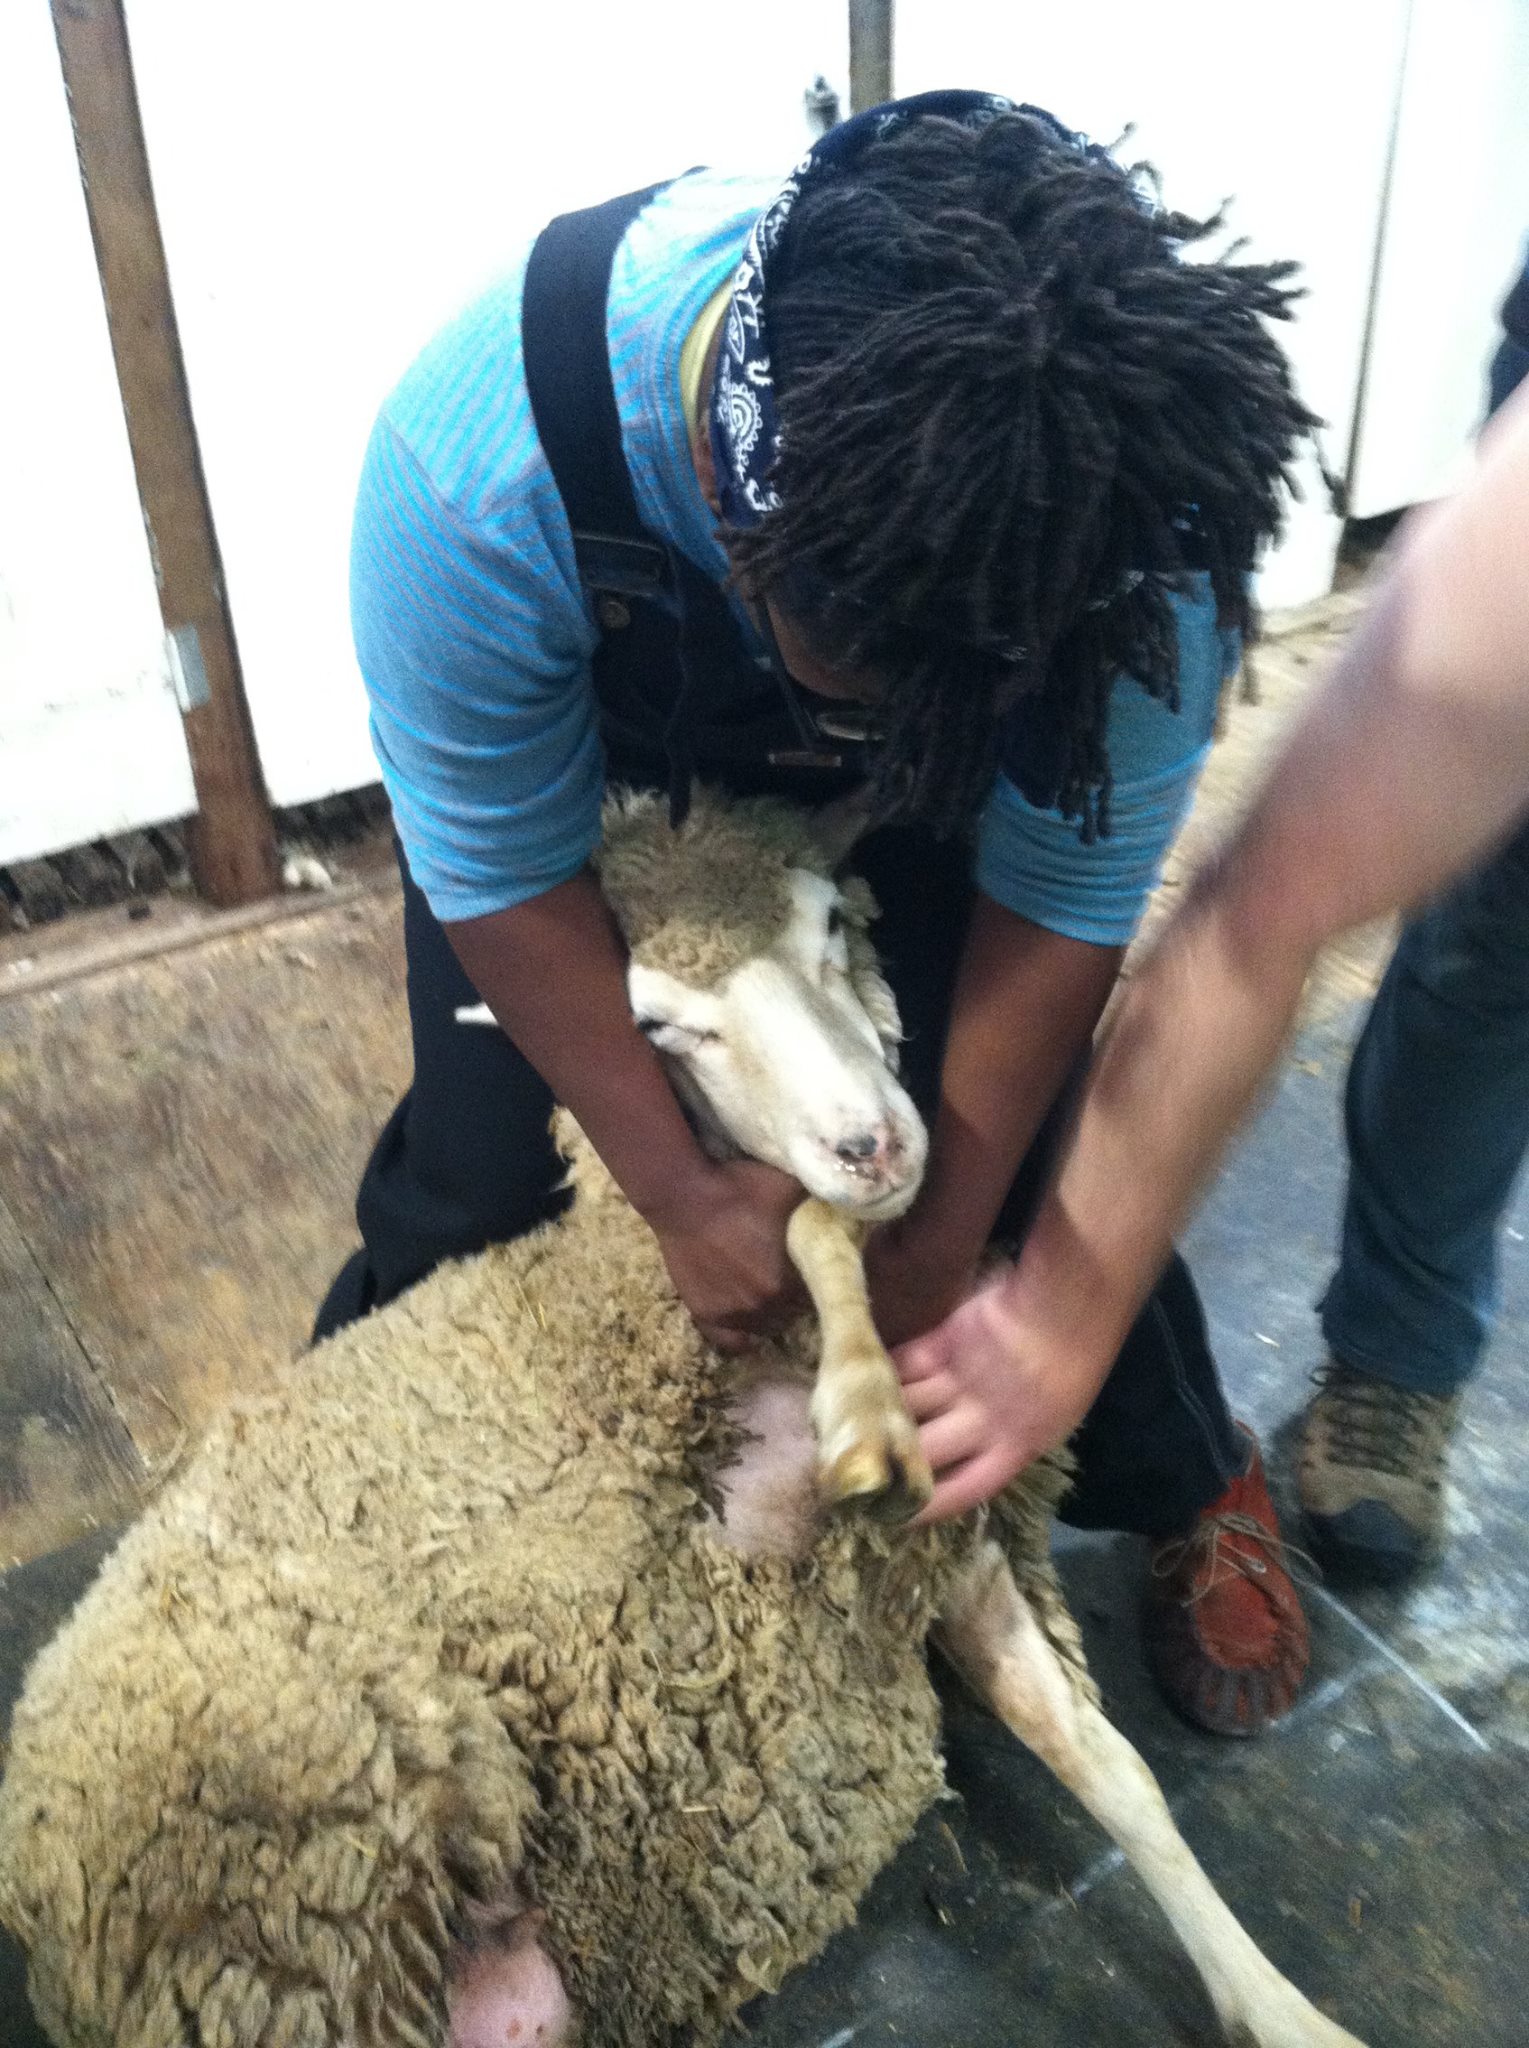
Sheep shearing is a full-body experience. Your legs have to hold and move a sheep that weighs 100-250 pounds while one hand pulls its skin taut and helps control and move it, all while shearing with the other hand (and sweating like mad while your back screams). Animal handling and equipment selection and set-up are 90% of safe, humane shearing you can be proud of. You do not want to hurt an animal or yourself, and it’s easy to do both if you haven’t learned from experts, hands on. The shearing strokes are the easy part, the fun part, the pay-off for all the hard, consistent, frustrating work you put in elsewhere.

Filed Under: blog, Sheep Shearing Tagged With: sheep shearing, sheep shearing school, sheep shearing training

April 7, 2021 by Stephany Wilkes

Get Thee a Handypiece Pro

The best tool solves all the right problems. And when it solves most, if not all, of your and your customers’ problems; when shearers buy it for each other, and then that shearer buys one for another to pay it forward because it’s just that life changing; then that tool has earned a dedicated blog post, at the very least. I am talking about the Handypiece Pro, the truly portable, go-everywhere, battery-powered sheep shearing machine. I first held one at McWilliams Shearing (the only U.S. retailer that I am aware of) when I was in Montana in December 2018 and wish I’d bought one sooner. (No, this is not a sponsored post or anything like that. I’m just a person, not a paid influencer.)

The upshot: If I were starting out as a small-flock shearer today (vs. in 2013), this is the only piece of equipment I would buy, because it addresses ALL my needs and solves ALL the problems other equipment did not.

A huge thank you to Gynna Clemes for these photos from shearing day at her place, so I could finally get this post written!

What is the Handypiece Pro?

All sets of shearing equipment have four primary parts: 1) a source of power; 2) a handpiece (what the shearer holds); 3) something that connects the handpiece to the source of power; and 4) combs and cutters that go on the handpiece.

The Handypiece Pro is different because its source of power is a battery, and a substantial one at that (a 12 volt 10.5Ah Lithium Polymer battery) with a low current draw. That combination — big battery power, low draw — means you can get through a day’s work on a single battery charge (i.e. crutching 200-300 sheep or shearing ~50, depending on your speed), in areas without power and without a gas-powered generator. Which is life changing.

You also wear all the pieces on a belt. When they said portable, they actually meant it.

Me wearing my Handypiece.

Look closely at the photo above and you will see three distinct things hanging on the belt, which is included with the Handypiece kit. At far right, you can see the purple Lister handpiece sticking up from the brown holster bag. To the left of that, beneath a leather strap with a snap to keep it secure, is the battery in its bag. And, to the left of that, just in front of my left hand, is the power switch and speed control. That is how I turn the Handypiece on and off, and either speed it up or slow it down, depending on the fleece situation and conditions before me.

The Features section of the Handypiece website goes into more detail on all of this.

The black thing around my midsection is not part of the Handypiece Pro, but a wool back warmer that is another critical piece of equipment (for me, anyway), as are the Red Ants Pants, made in Montana. All good shearing supplies come from Montana (and happy 406 Day up there, y’all).

There’s something about reaching into a holster for a handpiece that makes shearing feel even more bad a*s than it already is. A hawk screams, a tumbleweed blows through the dusty sheep chute, and the masked shearing bandit walks into a bar… Say hello to my little friend!

No more setting your handpiece on the floor. It goes in its holster now.

At risk of stating the obvious: You can walk onto the job and start shearing. I have a LOT more to say about that, so hold that thought.

In order to turn the Handypiece Pro on, you first connect the battery to the power switch. Then, you flip the switch on. This two-step process prevents accidental on/off. The black cord shown in the photo connects the Lister handpiece to the power.

Cord draped over the back of my neck and down my right arm, to keep it out of the way.

To keep the cord out of the way, and to prevent the sheep’s legs from getting caught up in it, I drape the cord over the back of my neck and down my right arm, something I copied from the videos on the Handypiece website. This more closely mimics a traditional set up in which a handpiece is connected to a drive shaft, which connects the handpiece to a motor, which is plugged into power.

Note: Sheep horns do occasionally manage to hook into the cord near my left chest area.

Critical Differences

It is the specific ways in which the Handypiece is different that matter the most, because it gives shearers the best of all worlds in terms of weight, portability, and heat. Typical portable handpieces require trade-offs between heavier weight and higher heat in exchange for portability. And, unless you’re using manual shearing scissors, you still need power.

Before I had a Handypiece Pro, I (like other small-flock shearers) had two sets of not-ideal choices for every job:
* EITHER a lighter, cooler, more comfortable and nimble handpiece, attached to a heavy, external, not very portable motor that required more set-up time and a stable structure to support it;
* OR a heavier, hotter, less comfortable, yet more portable handpiece, that required little to no set-up time but did require periodic cooling time.

Let’s unpack these tradeoffs, because I think they affect shearing usability more than almost anything else. Established shearers know all this and can skip right over this part.

Thanks to Jenifer Kent for this photo, taken for my May article in Grit Magazine about how to shear sheep on a stand.

Here is a photo of my Oster Shearmaster in action. I’m not here to knock it. It’s an affordable way to get started at just over $300. It weighs 8.4 pounds, though, not least because the motor is inside the handpiece. The Handypiece Pro, by contrast, is fully FIVE POUNDS LIGHTER, at 3 pounds (1.4 kg).

A heavier handpiece weight and larger circumference makes it more unwieldy, and for a much harder day on your hand and arms (hello, jelly arms). The motor being inside the handpiece makes things hotter, sooner (especially on 90-100 degree days), and the heat travels into the comb and cutter, which the sheep can feel. This means you have to stop working to let the handpiece cool down, probably more often than you want to.

Really think about that time-is-money bit on the business end of all this. When you’re not shearing, you’re not making money. You are standing around waiting for the handpiece to cool off. You’re earning less because you are spending more time at the job than you otherwise would (time you cannot spend earning money elsewhere), for free. I got to the point where I didn’t want to shear more than two or three sheep with the Oster. That’s just me.

Rachel’s stunning fleece (she’s a BFL x Jacob) and my much smaller grip. Don’t @ me about being out of position: Rachel is calm as long as she’s laying on her side. Sometimes the sheep tells you how it’s going to be sheared, and going with that can make your life a lot easier.

By contrast, note the smaller grip circumference shown above. The power source being external to the handpiece means it takes quite a while to get hot.

Prior to the Handypiece Pro, however, using a lighter handpiece like this (my Heininger) required me to set up an external motor (mine is a Lister QR) to power it. That motor weighs 22 pounds. It needs a stand or other stable structure (2×4 attached to two good posts, real solid fence, or similar) to support it. These are neither a given nor easy to come by. To wit…

Carrie and I in another world, February 2020, below a typical shearing motor set up

The photo above illustrates what is, far and away, my most common shearing set up: a fairly stable fence, with a couple of solid boards put together and ratchet-strapped to said fence, and the 22-pound shearing motor hung on top of the board, at the correct height (because it must hang at a specific height due to the length of the drive shaft that connects the motor to the handpiece).

This set-up is as good as it gets. Unlike the situation shown above, there is not always a barn, or any shade structure, or a fence, safe power, and light to see by. (I personally know three shearers who have been shocked by ungrounded or other poor power situations. They’re lucky they were able to get the handpiece away from them and didn’t die from electrocution.)

More often, you end up carrying a 22-pound motor through mud on your head, all over a farm, slipping and trying not to die or drop it on your foot or throw your back out, scouting around for a place to hang it or BUILDING a place to hang it. I started carrying spare 2x4s and a drill so I could improve set-ups from one year to the next.

I’ve never set my motor up in under 30 minutes (if you actually time it, walking loads back and forth from the parking, etc.), and it was often as much as an hour if I had to build and finagle things, connect four extension cords and run them through the next valley, etc.

I have set my 22-pound motor on a truck bed and sheared the sheep below it. Possible, resourceful even, but not ideal. Other shearers with welding and other skills have constructed impressive portable rigs, that either stand on their own sort of tripod base, or attach to a pick-up truck and swing out. I admire it but, as someone who does not have those skills already, believe that time and money is better invested in a Handypiece Pro.

Speaking of…

Let’s Talk About Money…

A complete Handypiece Pro kit, delivered, will run you about $1,000 USD. An Oster Shearmaster and similar tools cost $325-$500. A Nexus motor, drive shaft, and starter handpiece (my Heininger) cost about $1,500. Combs, cutters, and the rest of your kit are on top of that.

And I think you need both, which puts you at $2,000. You don’t always need the big rig, and sometimes there is truly NOTHING to hang it from. A shearer may not be ready or able to invest $1,500 after a few days of shearing school, so will probably spend $325 before they’re sure they will continue shearing. After a season or two, they have the ability and funds to justify the $1,500+.  

Or, you could spend $1,000 on a Handypiece Pro and never buy anything else, except a supplementary battery. If you almost always or only ever shear 50 sheep or fewer in a day, like I do, you can save $1,000 and not have so much equipment around to store.

About Time

That $1,000 saved isn’t all, because you will also save 30-60 minutes on set-up at every job, and get paid the same. Do the math on that over the course of a season. I often spent 2-4x as much time setting up as I did actually shearing (DEEP SADNESS HERE).

Reducing set-up and breakdown time also makes it easier to do two jobs in the same area in one day, and not be late or working into the night because of unpredictable or janky situations. That’s more money, too. For years, I resisted booking two-job days (even if I was quite close to a second job) because I could never predict how long the entire set-up situation would take, or how physically draining it might be. Would I have enough energy for Job #2 after whatever might be required at Job #1? Who could say? You need ALL your energy for shearing and hoof trimming. 

Reduced Frustration Is Huge, Too

I won’t lie: I got frustrated with bad set-ups. Despite my sending photos showing simple, good set-ups, and extended (hour-long) phone conversations and email exchanges on how to build a good set-up (which is unpaid time), I’d show up to a job and have nothing.

Good shearing set-ups don’t have to be complicated. This is four hog-wire panels, one horse or garage mat, and we’re on the flat driveway between my car and the raised beds. Great!

So I did other things to try to make up for folks not being set up. In late 2019, after great deliberation, I changed my 2020 pricing model to a flat rate of $100/hour (instead of the usual ranch call + per-head price), so I could get paid no matter what work I was doing on a job. It rewarded what I saw as “good behavior.” Folks who set-up paid less for shearing than usual, and folks who were not paid more. That went out the window as fast as it came because, with COVID, I had to do ALL the work myself. It wasn’t fair to pass COVID costs onto customers.

But I was wrong. I was solving for the wrong problem. Ultimately, getting set up to shear a handful of sheep once a year, who belong to people who often also have off-farm day jobs, is a vastly different context than shearing hundreds of sheep that get sheared every year, and reside in a place with experienced ranch hands and infrastructure.

The Handypiece Pro solves my problems AND theirs at the same time, for $1,000.

Observations, Tweaks And Hacks

I started using the Handypiece in October, and have not been able to stop it from spinning around my waist somewhat. The handpiece holster rotates toward the back, and the battery and power switch toward the front.

Gynna made a terrific suggestion after watching the Handypiece in action at her shearing day: mounting the Handypiece onto a shooting or carpenter’s harness instead, which would prevent rotation and balance the weight of the items on the belt.

And what did another Handypiece shearer send me a photo of just a few days later? That very idea, implemented (which I hadn’t even mentioned). The same problem inspired the same solution.

The Handypiece items mounted to a carpenter’s harness, instead of the default belt.

I am now shopping around for a harness that will fit me well, to do the same.

One final note: Do not throw batteries around or drop them. That is dangerous, explosively so.

Now go forth and shear, in less than half the time.

Filed Under: blog, Craft, Sheep, Sheep Shearing Tagged With: handpiece, handypiece, sheep shearing

December 7, 2019 by Stephany Wilkes

A Sweater Vest Elegy For a Shepherd

Or rather, the employment of a shepherd; Jim himself is still with us. Structurally, an elegy expresses sorrow, sings praises, and offers solace, and an appropriate format (poem, prose) is chosen. This is the letter I sent with Jim’s vest.

Dear Jim,

I was gutted to learn, in late May, about the changes at Hopland, none for the better in my admittedly from-a-distance opinion. Like most everything these days, I learned of the flock auction and the elimination of your position on social media, just two weeks after this year’s shearing school. There it was, over my morning cup of coffee: a Facebook event inviting me to a sheep sale, a flock reduction from 500 breeding ewes to 125, as if this auction were not a swift kick in the gut but an event like any other — a craft fair, a fiber festival — I’d want to attend. As if loss of vocation were not a factor.

Worse, the auction was too soon in the future to stop it: in less than a week, on June 3. Everyone – the Gilberts, the Irwins, Jordan, Alex, Gary, everyone — was devastated, sick to our stomachs, furious, liberally cursing the UC Regents and Janet Napolitano. We knew that as go the sheep, so goes the shepherd and, possibly, flock quantity sufficient to field a shearing school, the only one in California. 

Shepherd Jim Lewers at work in Hopland, January 2018

Had I my own land, I would have done what everyone should have: show up and bid well over the asking price for the sheep you bred and shepherded so well and carefully for so long, because that is what people are supposed to do in such unfortunate events, and know to do in other, better-mannered sheep places (Iowa, Montana, Shetland). But I have no place, and was in Modoc County teaching 4-H kids how to trim hooves, among other things. Even so, I regret not finding a way to attend the auction to convey my sorrow to you in person, and share yours. I don’t know if you were there, though I expect you must have been. What would have been worse: being there and having to witness that sheep sale, or not being there at all? As with too many things, if you can’t fix it, you just gotta stand it, the hardest thing.

There is a great deal wrong with our culture right now, and the apparent failure of UC budget bureaucrats to recognize how rare you are — an American shepherd, practically unheard of these days!  — and how valuable your skills is among them. Now, I don’t know you or your daily work terribly well, but I thank you for your dedicated flock and grazing management that helped save the HREC campus from the 2018 wildfire. I see and count the terrible things you prevented from happening: the people who did not die in an inferno, and the lawsuits to follow; the insurance claims and policy increases from incinerated buildings; the reconstruction costs of buildings like LEED-certified Shippey Hall. 

We have not spent much time together, but you taught Hopland students a great deal in those brief windows between sheep, standing in that barn aisle between the tray of decontamination fluid, the sink, and the shearing floor. You blew my mind with stories of when non-lethal predator control works, and doesn’t, and why something that works on one county and landscape won’t necessarily work in another. Many people refuse to acknowledge and hold such complexity, preferring easy, belief-reinforcing answers to very difficult problems. I always liked your refusal to give those. 

You taught me about herding and livestock guardian dogs (Bodie!), and showed what they were capable of. If anyone had told me that one command could send a herding dog far out of view, have them return with a flock, and then split that flock into groups, I’d have called them a liar. Thanks for the show. You educated me on ​Q fever, described how bacteria spread it to humans from animals including sheep, and then appropriately restricted my access in the lambing barn. I’m grateful, because Q fever is hell for shearers who have gotten it. They describe six to eight weeks fully laid up in bed, these strong people, with a severe flu-like illness and, worse, persistent and long-term health problems. 

Please know that we all saw how you loved those sheep, even if we cannot fathom how much. You are a true steward. You helped make a lot of shearers. Your impact is lasting, not just on the landscape but on all of the people who have passed through that big barn in which you taught, helped, and supported us…and filled the pens with seemingly endless sheep, over and over again. That’s all right; it was good for us.

I wish I had more words of consolation to offer, but all I feel is outrage and frustration that I’ll just have to shear out of myself. In lieu of that, I thought I’d make something that might console better than my awkward typing ever could: this sweater vest, 100% Mendocino County Targhee like your ewes, sheared by Matt Gilbert (who I’m told was called “barefoot Matt” when he learned to shear at Hopland as a shoeless whippersnapper). It was processed and spun up the road in Ukiah, by Sarah Gilbert, and the yarn is some of the very first to come off the pin drafter and onto the spinner. 

I knit it up into a vest, thinking a sweater might be too warm, and I have no idea if the sizing is right. I tried, because I wanted it to be a surprise. Matt was my fit model, and who knows how close of one, and the rest I estimated from photos of you. If it’s too large or too long or too anything, I can easily fix it; just say the word. The wool was white, but I could see that getting dirty pretty easily knowing you, so I thought I’d dye it gray with eucalyptus and iron, to match the color of the work overalls I so often saw you in. 

Eucalyptus leaves + iron = gray

The vest comes too late for your last day at Hopland but, if nothing else, it’s finally sweater vest weather, isn’t it? I hope your grass has germinated. The combination of late rains and cold temperatures have had me worried but, in some places, I’ve seen tiny green spikes and future sheep feed. If you ever need a hand building fence or mucking out pens, give me a shout. 

With gratitude, for everything,
Stephany

Filed Under: blog, Craft, Sheep, Sheep Shearing Tagged With: hopland, sheep shearing, sheep365, shepherd, stewardship, university of california

February 6, 2019 by Stephany Wilkes

The Phenomenal Pora, or Some of What I Learned at Advanced Shearing School

I attended Advanced Shearing School with Australian shearing guru Mike Pora from January 28-30, 2019 in Newell, SD, and thought other shearers might benefit from some of what I learned.

I took this class for a few reasons. First, as shearers are known to say, “If you’re working too hard, you’re working too hard,” and I am working too hard. Second, I wanted to learn more about shearing fine wool sheep, which are rare on the West Coast; I shear mostly crossbreeds, or non-fine wool breeds. Fine wool sheep in the US are found in Nevada, Montana, Wyoming, the Dakotas, etc.

Third, at this stage in my life, I cannot get to Australia for a few months to learn to shear there. Well, technically I could, if I intended to abandon my grandmother with dementia and cancer here in California, but that’s not an option. I figured that if I can’t get to Australia, the Australian was coming to us, and that was the next best, doable thing. (Young and/or unattached shearers, do you hear me? Go learn and work in Australia. See the world! Vamanos, whippersnappers! Fly, my pretties, fly!)

Finally, I often work alone and not on crews with expert shearers who can teach me things. As a result, I develop my own shearing adjustments and bad habits, of both the conscious and unconscious sort. I need eyes and expertise outside of me to help me learn and do better.

And it sure was a good excuse for a vacation with the lady shearers you’ve only met online. We were in a Vogue article together and now we’re friends.

In regard to working less hard, and doing everything we can to ensure we can shear as long as we can, Mike taught us footwork and positions to get the sheep to hold more of its own weight, and to get that weight off of our legs and knees. People think shearing is hell on our backs, and it can be, but my knees, quads, and hamstrings take the brunt of it, because those hold the sheep.

Brisket over teats. Spine behind.

A few things to note in this photo: The sheep is holding its own weight, comfortably shifted onto its right hip (not its tail, which sheep hate). Mike’s left knee is over the back of the sheep’s neck, and the sheep’s spine is behind Mike’s calf.

When standing this way, you can feel the sheep’s spine behind your left leg, their back bone leaning against your leg bone. The difference is that your left leg is not required to hold the sheep and prop it up. Your leg braces and grips the sheep, but does not support it.

After feeling the right way to do this, I realized that I often have the sheep’s spine on the wrong side of my leg, supported by my front shin, with my left knee holding up a substantial portion of the sheep’s weight (no wonder that knee is the crackly sounding one). Altogether, this meant that, while shearing the sheep’s first hip, I was supporting the sheep’s weight with my left knee, while also bending forward in half to reach over to the tail. Not fun, and so much harder than it needs to be.

We learned this lesson in the first hour of the first morning so, very early on, I had already learned something valuable that will make my life substantially easier, and prevent injury, wear, and tear. “This class doesn’t cost enough,” I thought, and I meant it.

But there’s something more going on in this position, too. Notice how the sheep is angled, almost matching the angle of Mike’s foot, which is not straight but pointed outward from his body. Mike is looking down over the sheep’s hip more than its belly. When shearing the belly, crutch, and first hip, many of us are oriented more directly over the sheep’s belly, in a straight line, and not at this angle.

This brings me to another big lesson: crutching when the sheep’s weight is situated more like this, and not just when fully laid back as they can be during belly shearing. It was, initially, a bit mind-bending to look down and see the sheep’s crutch area less open and a bit more tilted, with its rear, left leg resting into the crutch area more than unusual, but crutching was still possible, safe, and made the transition from the crutch into the first hip much easier.

As for getting the sheep to hold more of its own weight… When I learned to shear, I was taught to have my right knee turned in to the right side of the sheep’s brisket when shearing the first hip. This meant my right knee ended up holding the sheep up at the brisket, not just bracing it but preventing it from slumping over to the right side. By copying Mike’s moves, the sheep supported more of its weight, required less of my leg pressure in the brisket and, combined with the sheep’s spine sitting behind my left leg, made for a much easier shearing of the first hip.

But wait, there’s more.

The above photo may look like a typical one of shearing the first hip, but let me tell you about what Mike’s left hand is doing (and does next). Because the sheep is stable and holding a good bit of its own weight, Mike can really pull the skin on that leg juncture and hip right up toward him (not just rolling it toward him, but pulling that hip more up than over). This makes the skin taut on these wrinkly fine wool sheep, for a clean, nick-free hip of nice wide blows.

Another pro tip for this stage of shearing: On your blows up the spine, the bottom teeth should land where the tip of your middle finger on your left hand is. This sounds like I’m telling you to aim for your finger, and I’m not. What I mean to say is: When you’re finishing the left hip, doing those blows from the tail up the spine, and your left hand is pulling and rolling the sheep toward you so that you can reach to and over the sheep’s spine, the fingers of your left hand are pointed at the floor. The imaginary line that would extend from the tip of your left middle finger across the sheep’s back is the depth for which you should reach with the bottom tooth of your comb.

And now, a few words about neck blows. The above is the correct positioning for the neck blows. The sheep’s chin is at a 90-degree angle to it’s neck, a normal position (vs. the sheep’s chin being pulled back, akin to our walking around with our chins high in the air, which is neither normal nor comfortable).

Mike showed us how to pull the skin on the chin up to tighten it (much more comfortable for the sheep and its breathing), and NOT pull the chin itself, as some instructors teach, in the “Pull the chin taut and get through it quickly” school of thought. All shearers know, or should, that the greater the sheep’s comfort, the less it fights, and the easier the shearing is as a result. Shearers have every incentive to keep sheep as happy and comfortable as possible, and this is one more way to do so.

In the neck blow photo above, you can also see how the sheep is supporting more of its own weight. The shearer’s right knee is still behind the right brisket, and both of the sheep’s right legs are behind his (i.e. the shearer’s right leg is where it’s supposed to be, in the crutch between both sets of legs). At this point, shearers are like “Duh, that’s what you’re supposed to do.”

But this is the most difficult footwork position for me, and always has been. This is because I am terrified of cutting the sheep’s neck and shoulder. So my WRONG AND ILL-ADVISED modification has been to push all of that sheep’s weight out in front of me during the neck blows, more akin to the position of shearing the last side. This puts all four of the sheep’s legs in front of my right leg, and all of the weight (on the sheep’s hip in the above photo) bowed out in front, supported–but NOT well controlled–by my right leg and left forearm and hand.

The upshot is that these maneuvers stretch the front shoulder skin out nicely, but that’s about the only benefit of my mangled, ugly dance. I don’t have enough control, the sheep feels like it’s falling forward and about to collapse toward the ground (because it is), and the sheep kicks because all four of its legs are totally free to do so. Joy.

So let’s talk about what we should be doing on a wrinkly, fine-wool neck as taught at this advanced school.

In the photo above, the great Emily Chamelin (AKA Lady Shearer Prime) has the sheep in the correct position, and Mike Pora (left) and Alex Moser (right) are talking about the pressure of comb teeth and the dreaded wrinkle. Fine-wool sheep (Merino, Rambouillet, etc.) have a wrinkle like a wattle, and shearers take great care not to cut it. Mike showed us how, on the first neck blow, you want the comb pressure on the top teeth and, on the second blow, on the bottom teeth. This effectively leaves you shearing each side of the wrinkle and not cutting it. This is a very subtle, nuanced and important technique.

I have been using a neck blow modification that has worked well so far, and that Matt Gilbert taught me especially for wrinkly-neck fine wool sheep. I may continue it even after this class, but will devote time to practicing Pora’s method. Matt’s modification is to turn the sheep’s head to move the wrinkle. You can get an idea of this using your own neck.

Look straight ahead, and turn your level head all the way to the left. The skin on the right side of your neck is smooth, and there’s a wrinkle on your left side. So, you would shear the smooth, right side, where there’s no wrinkle to worry about. When you turn your head to the right, the wrinkle is on your right and your skin is smooth on the left, so you shear the left. This cleans the neck in two wide passes.

Now, let’s talk about the long blows.

Notice how the sheep is on its back more than on its side, and that the sheep’s right shoulder and brisket are against the shearer’s left shin. This creates more control of the sheep. I have not been doing this properly.

I hate to admit that, after six years of shearing (and not enough sheep), I sometimes still turn the handpiece off, walk the sheep into this position, and start up the machine again. The pros spin the sheep around and, as it lands in this place, take the first blow without skipping a beat. Sometimes I do that, just not as often as I’d like.

Mike asked a good question: “Stephany, what does a hay bale do on its end?” “It spins,” I said. And there’s the wisdom. If the sheep is sitting on a small point, and holding enough of its weight, you can basically pivot/spin it down into the long blow position, voila (with an assist from lanolin).

Another lesson I will implement right away is the six-sheep focus technique Mike taught: Pick one improvement to focus on (like a certain footwork position, or maybe the comb pressure on the sides of the neck wrinkle, etc.), focus on that for the next six sheep, pause, evaluate how you’ve done and what you need to fix, and shear the next six sheep.

My self-assigned homework is to find some sheep to walk around with. If I had my own sheep, I would do nothing but walk them through each position with only my legs, hands free, until I got every bit of the footwork right. Shearing jobs don’t lend themselves to this, as the job needs to get done, but I’m thinking of asking some friends to let me walk their sheep around with my legs for a day. This is why we take time for things like school, though: we can practice at school in ways we cannot on a paid job.

I can’t cover everything I learned in just a few days, but I hope this post inspires other shearers to take a course with Mike Pora, the master of nuance and finesse.

And good heavens, it was gloriously beautiful.

Filed Under: blog, Craft, Sheep, Sheep Shearing Tagged With: american wool, sheep shearing, sheep365, wool

  • Page 1
  • Page 2
  • Go to Next Page »

Primary Sidebar

Order your copy today

Amazon

OSU Press

Indiebound


You can buy wool cheaper in Australia; let your forty acres of sheep grazing land go to waste. You can buy rice cheaper in some foreign clime; let your rice lands go to waste. You can buy woolen goods cheaper; burn your woolen factories, let your water-power run to waste, and cease to work your coal mines. God made a mistake when He gave you these gifts.

William Lawrence
The American Wool Interest, in address of the Farmers’ National Congress at Chicago, November 1887

Footer

Connect with Me

  • Facebook
  • Instagram
  • Twitter

Handcrafted with on the Genesis Framework